Painting Demonstration 1
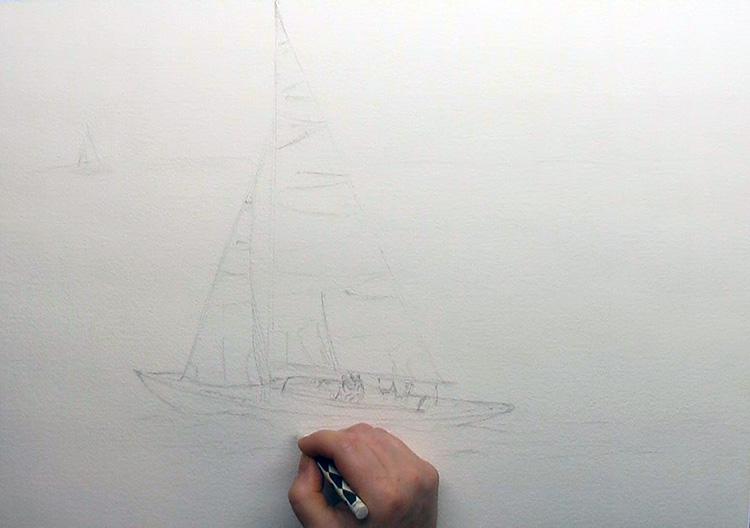
Always sketch very lightly in watercolor since most pencil lines will show. You want the focus on the painting, not the drawing. Unless, of course, you're highlighting the pencil lines!
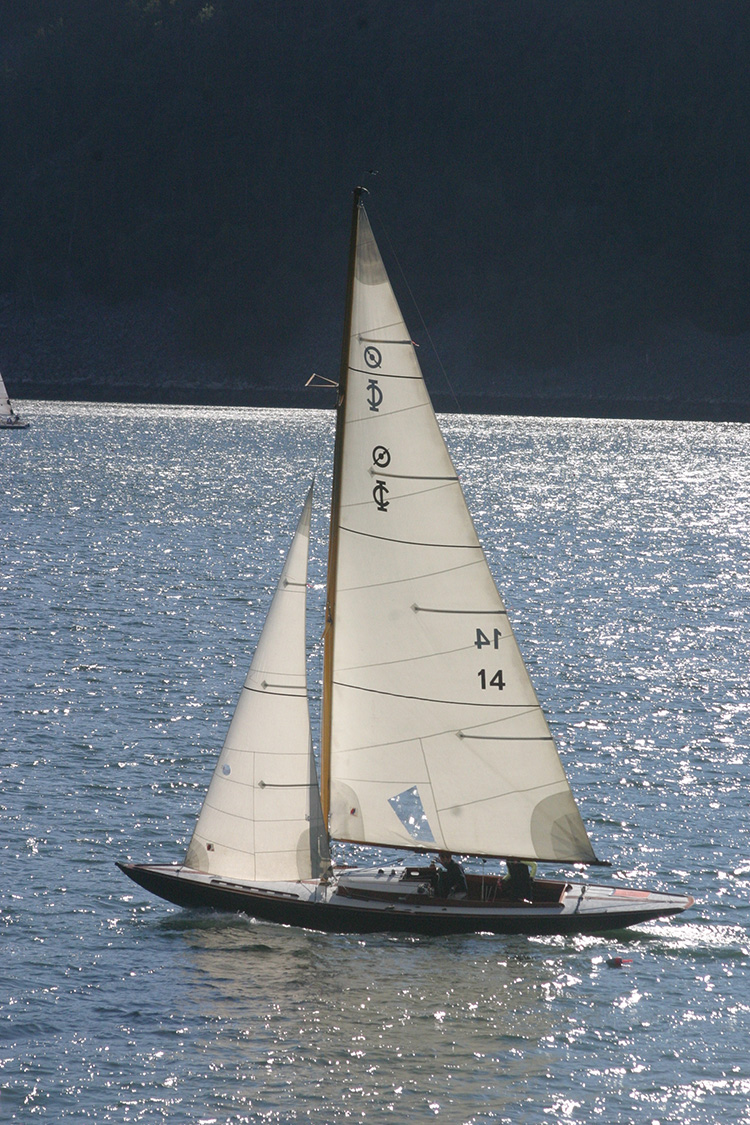
Since I'm painting a light object with a lot of brushstrokes around it (for the water) I can either mask it out, preserve highlights with wax or use white gouache. I decide on a combination of the last two since they feel more spontaneous than masking and I don't have too many bright highlights.
When you use a wax crayon, always remember it's there for better or worse. It will not come off and leave paper the same!
Disclaimer: Jennifer Branch Gallery is a participant in the Amazon Services LLC Associates Program, an affiliate advertising program designed to provide a means for sites to earn advertising fees by advertising and linking to amazon.com. I receive a small rebate for your entire order (starting at 4%) if you choose to purchase through Amazon. Most items can be bought multiple places and I highly recommend local art stores if you have one! Any other recommendation links I receive no compensation for.
These referrals help me support this website, and I thank you for any purchase you make through them. I will never recommend a product I have not used frequently and believe is the best tool for the purpose!
Painting Demonstration 2
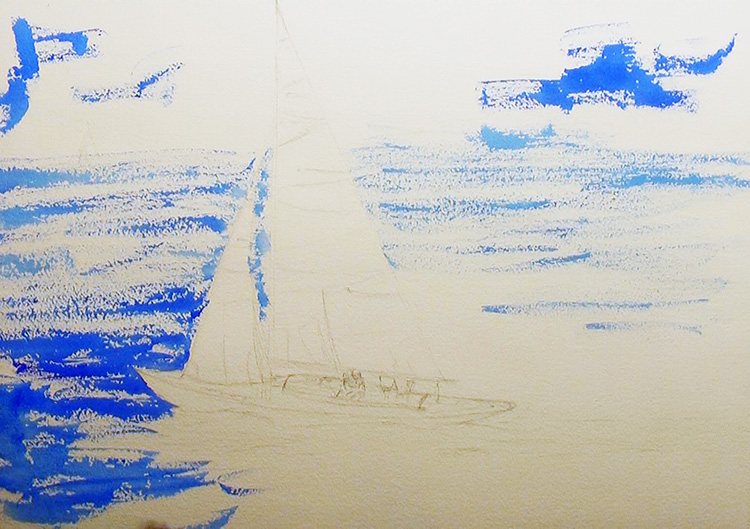
I want barely there water sparkling in the background. Very pale highlights and dark shadows, so dry brush is the solution! Dry brush and texture is why I chose the rough press paper, after all.
With a tricky dry brush where every stroke shows, I like to test the brush a few times on an area of the painting that isn't quite so tricky or a scrap of paper. As you can see, I got the texture just right in the trees at the upper part of the painting. Some extra texture there is perfect and it will be dark enough the individual strokes don't show.
Since all those strokes show up in the water, make them count! Move your brush with the waves. Notice how highlights show up in horizontal swathes across the water. Work with the water, not against it.
A squirrel hair brush is perfect for hit and miss dry brush like this. It barely touches the ridges of the paper so you can really get that sparkle!
Painting Demonstration 3
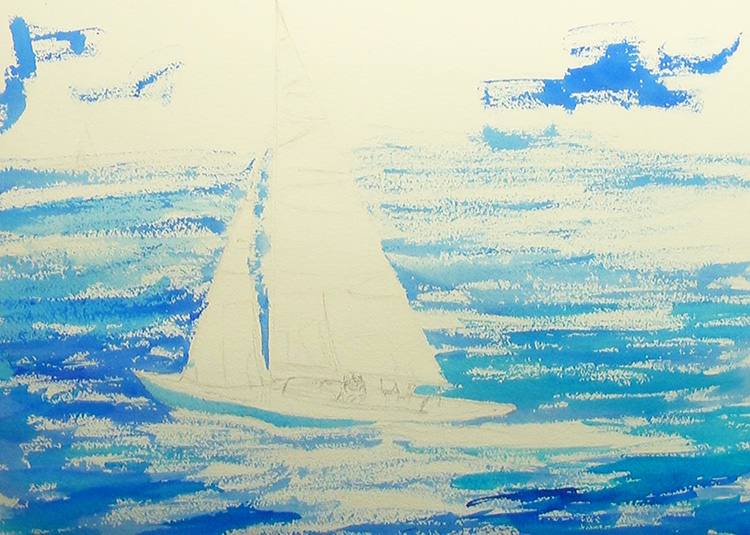
Since this is dry brush, there's no time between washes! I continue moving around the painting, using slightly varying blues and values. This gives me that great water shimmer! If some of the dry brush hits a still wet area, great! that gives a natural feeling variation.
I still keep everything light in value in this wash. I don't want thick sludgy paint, but effervescent sparkle!
Artist Tips
Reflections always come directly toward the viewer.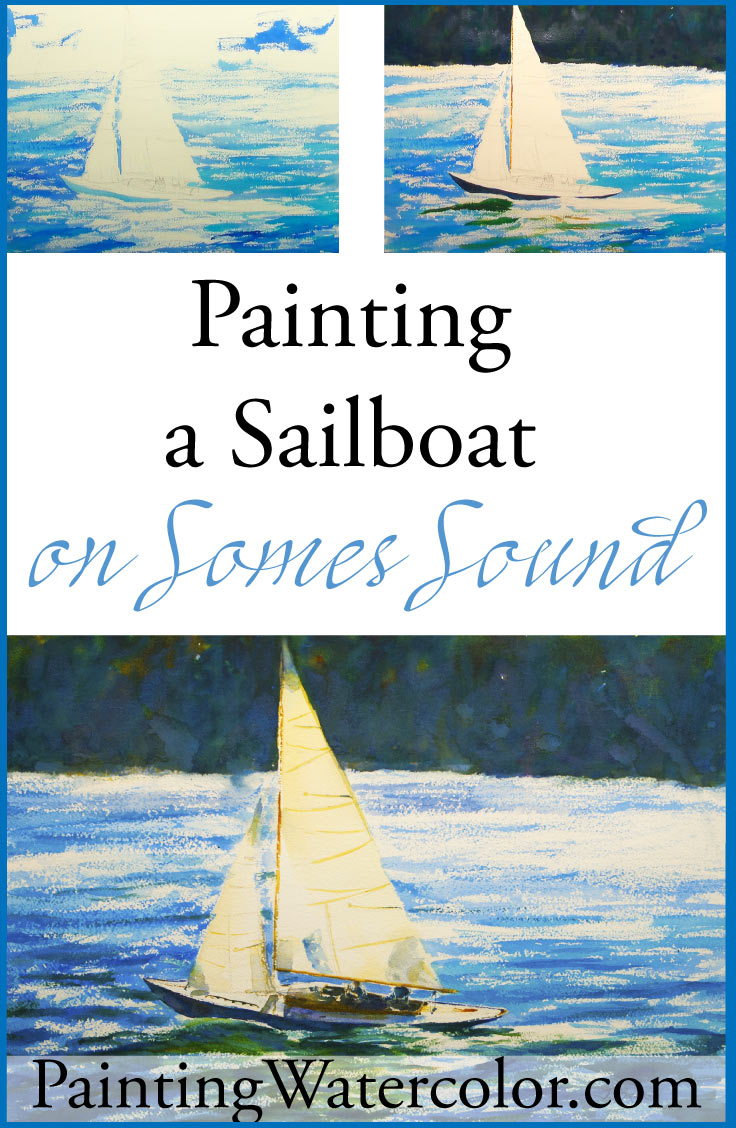
Painting Demonstration 4
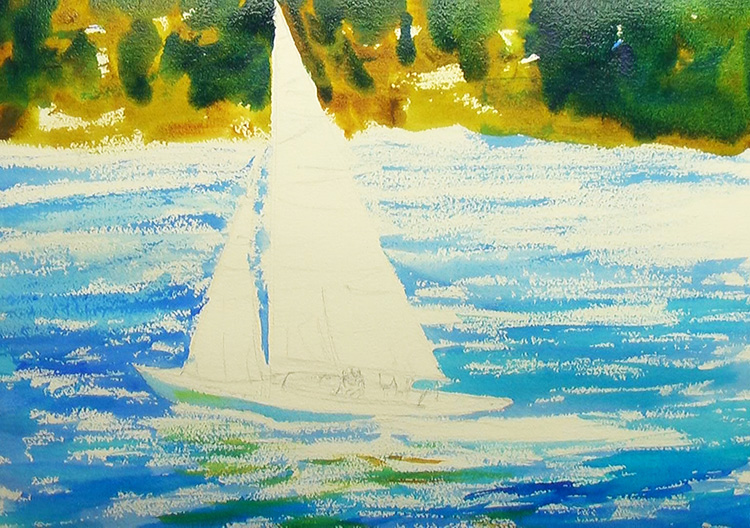
Now that dark background! I want a bit of a a golden glow, but subtle instead of harsh so I use quinacridone gold. This is one of the few paintings I never use a yellow in!
I paint a loose wet brush on dry paper wash of the gold, then drop in pthalocyanine green. I'm keeping it loose since the background is not the focus, the sailboat is!
The reflection of the sailboat is also a golden glow in the water, so I use quinacridone gold again. I'm still painting dry brush since I want the water to sparkle there too, not be dulled. The reflection is also a shadow which makes it quite complicated to paint.
Painting Demonstration 5
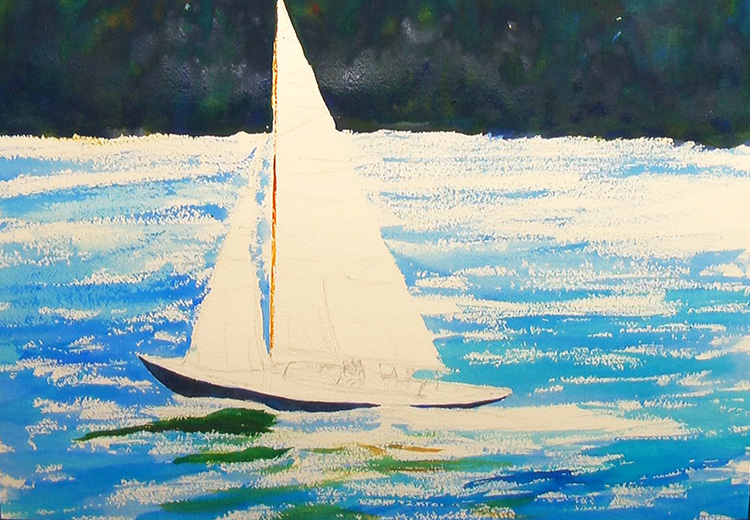
Now it's time to turn the golden green into hazy rich darks. While it's drying, I move maroon perylene into the trees to darken them. The rich red helps with the strong, clear color. Then I scrabble in ultramarine blue to make the trees green again. Finally, I add cobalt blue for the slightly opaque haze.
I dash quinacridone dry brush on the wooden mast. A bit of ultramarine blue and pthalo green gives shape to the boat.
Painting Demonstration 6
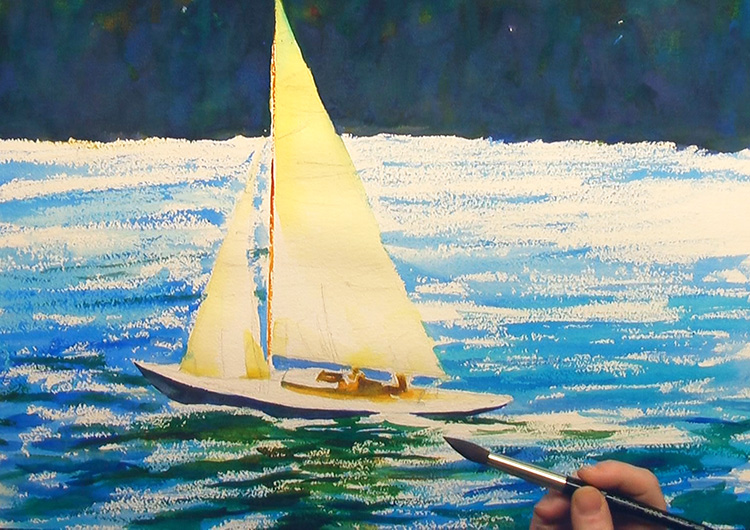
After the painting has dried completely, I start on the sail. The gorgeous sail is really the star of the painting so it's fun to finally start painting it! Still, it has to be kept simple since there really isn't much to the sail. Quinacridone gold gives the faint glow of the reflecting sun.
I continue adding texture and color to the waves. I need strong darks to balance out the background trees.
I keep a light hand on the waves since the lovely shimmering could be destroyed with a few strokes too many!
Painting Demonstration 7

The last stage is the details and it's hard to keep them from getting too fussy!
I continue the details on the sail. I use the top mainsail reinforcement as an excuse to dull down the arrow pointing the viewer out of the painting!
Some gentle rigger strokes define the sail. Most of the color is pulled in from the background, with a few touches of cobalt blue added in the corners. Since the sail is translucent, the color is mostly the background color.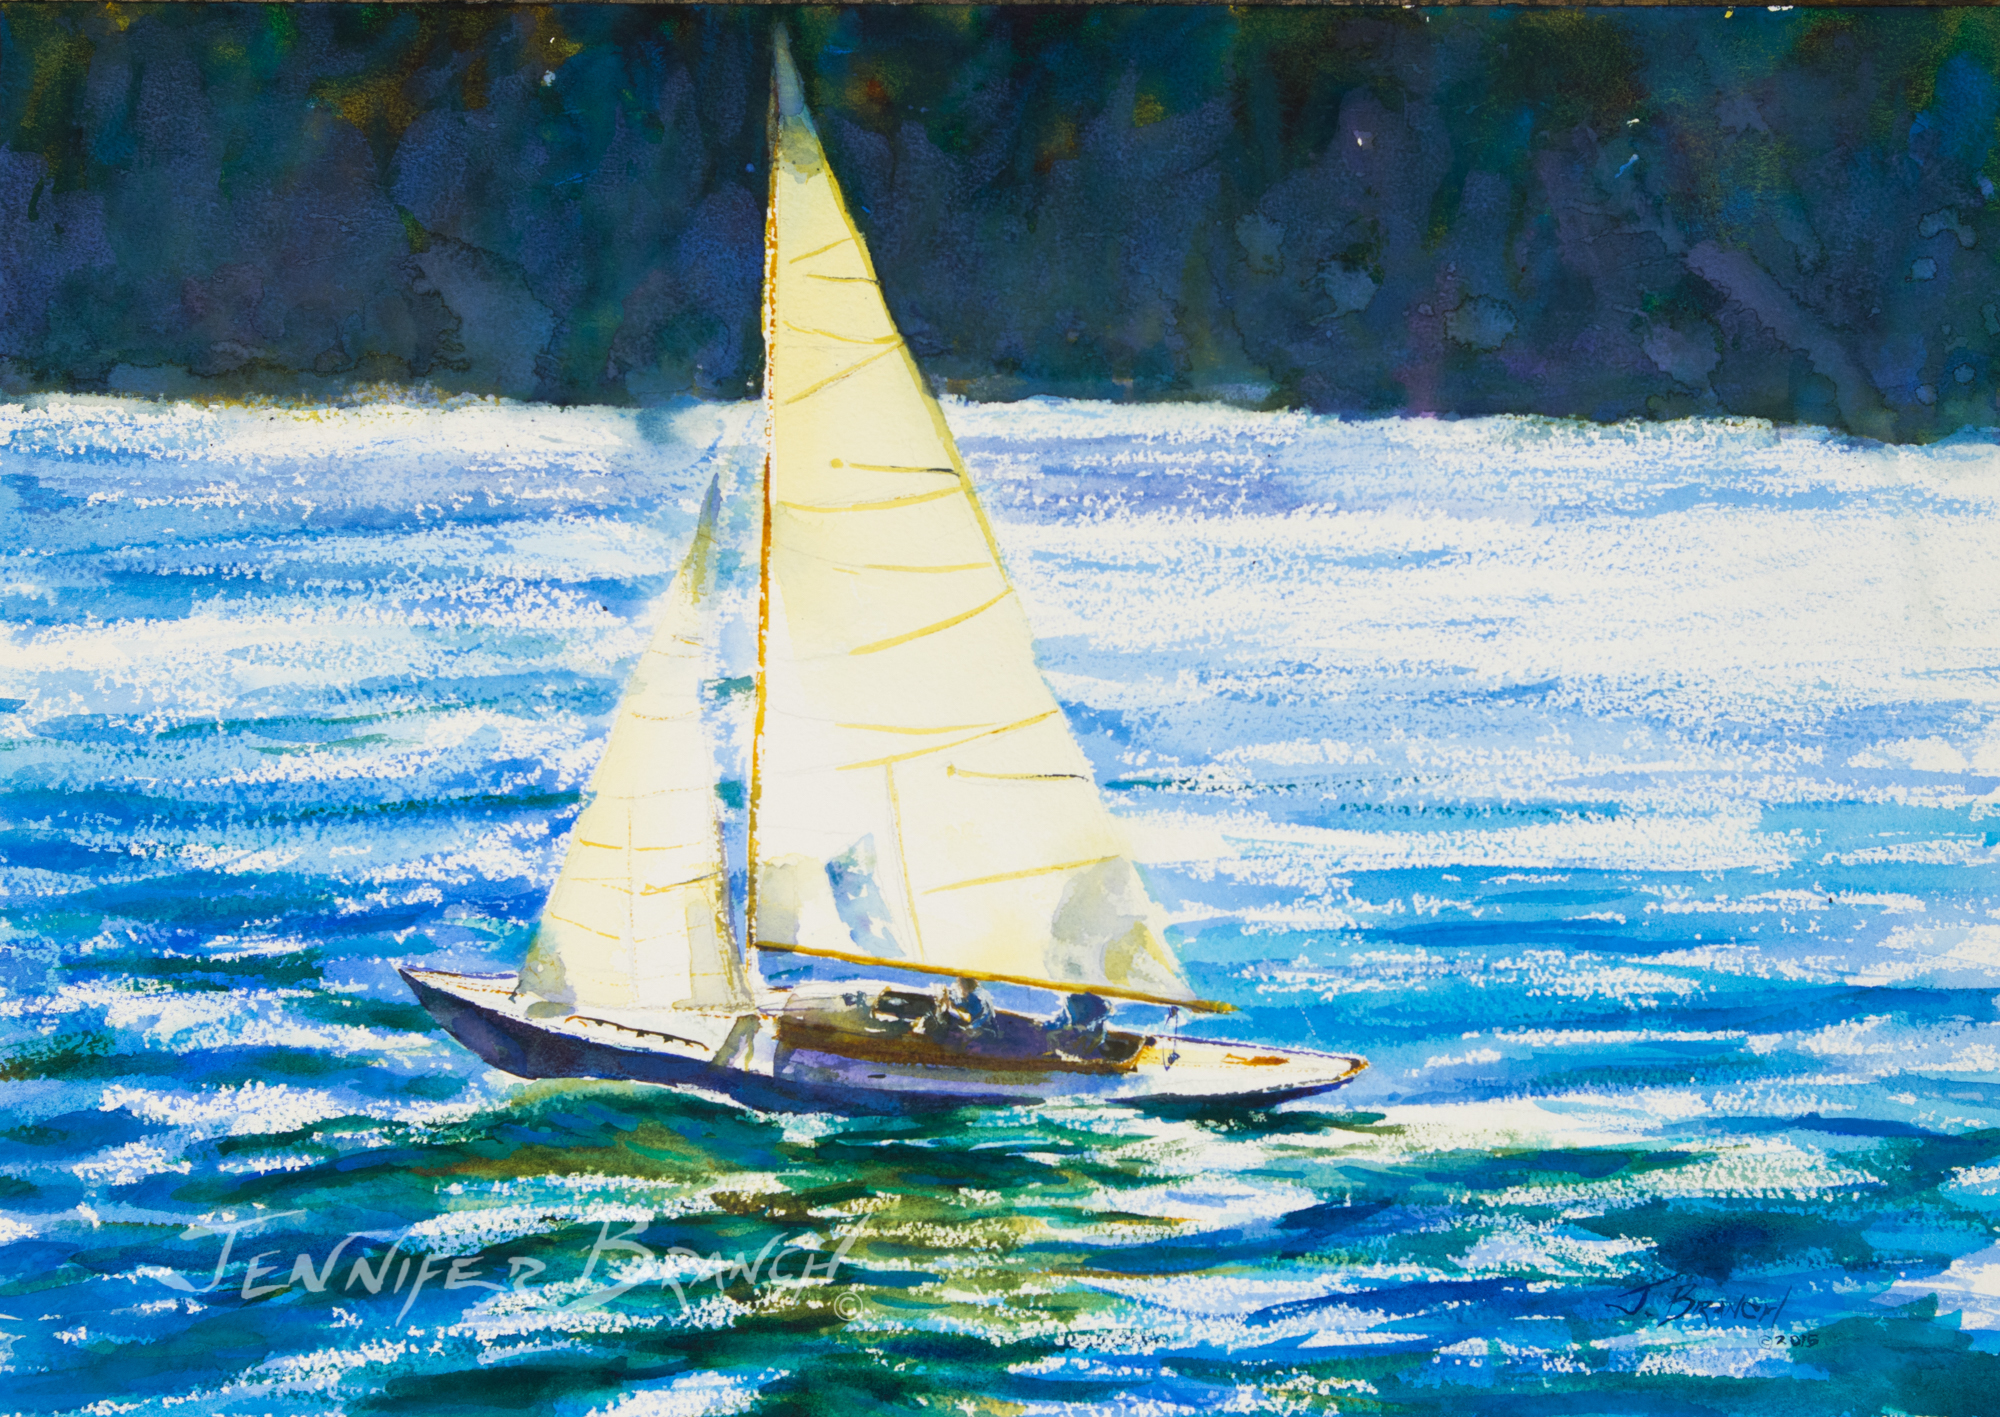
To purchase How to Paint a Sailboat original watercolor painting, please click!
How to Paint a Sailboat Final Watercolor Painting!
It's difficult not to add a ton of detail at the end, but I restrained myself! I know gleaming metal and polished wood are hard not to paint, but all I did were hints of the color and shine. A little bit of shadow to give the cockpit shape is all the boat needs to finish it. The sailers are just vague shapes highlighted with a bit of gouache. Any more and it's just too much detail for a lovely day of sailing!
I hope this inspires you to sail or paint sailboats this summer!


