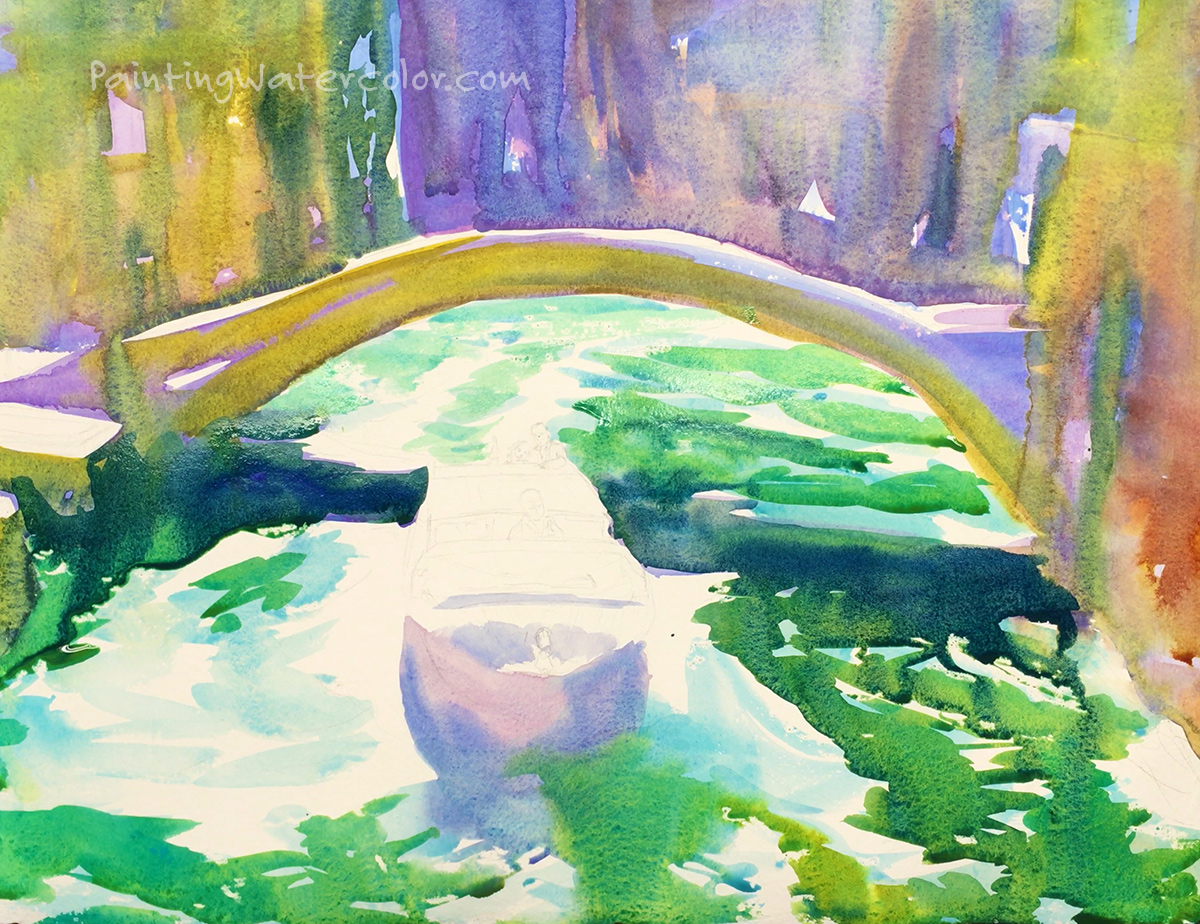
Painting Demonstration 1
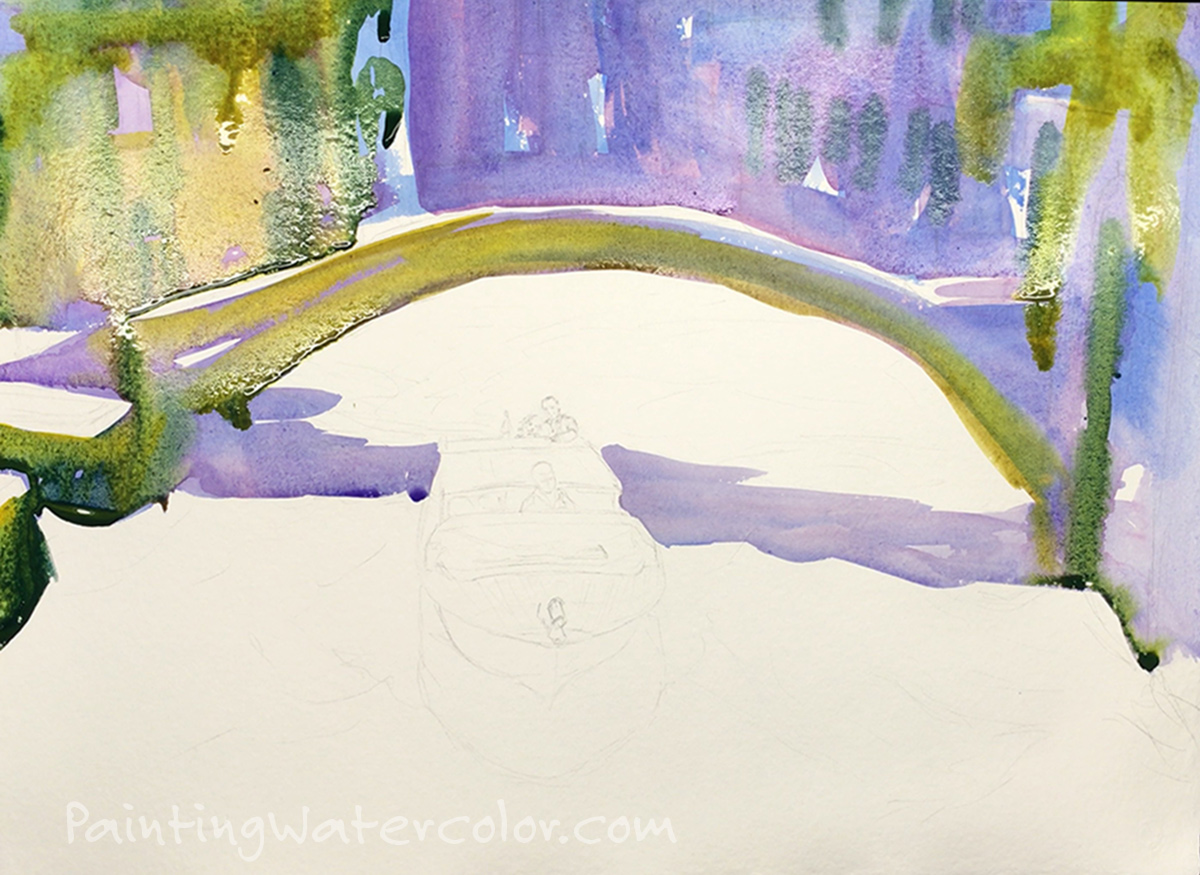
I start out with a wash of cobalt blue and cobalt violet watercolor in the "backdrop" of the painting. I want the background to be dull and dark enough to contrast with the water taxi and the water. Too much detail will distract from the boat, so a light hand is needed on the buildings. I want hardly any details, just a general dark blur that wtill needs to recognizably Venice.
A few splashes of nickel azo yellow show where the highlights of the buildings and bridge will be, very soft in the shadows.

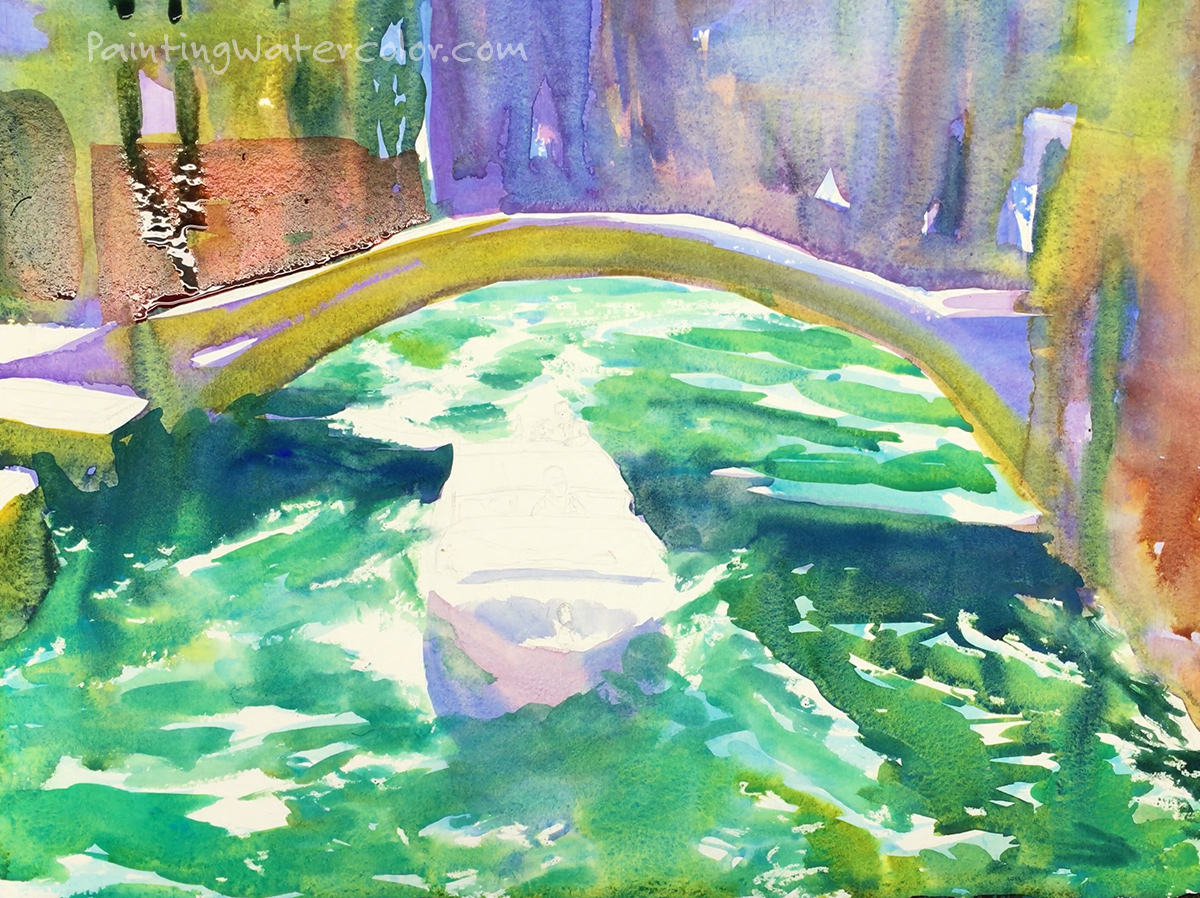
Painting Demonstration 2
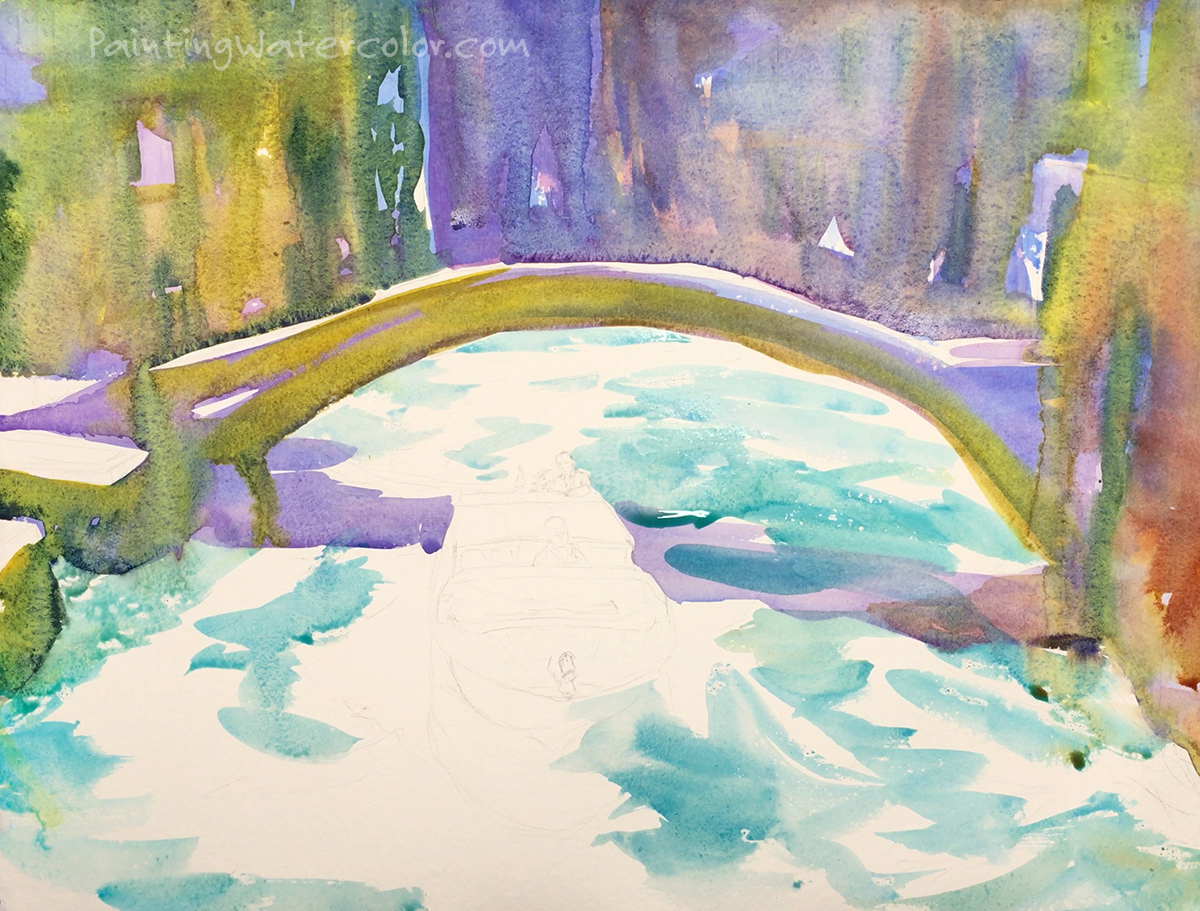
After the background is painted and slightly dried, it's time to start on the water!
I love painting water and this water is particularly fun. It's choppy and churning back from the deeply shadowed buildings. The boat is causing all the waves so their direction is simple. The wake of the boat bounces from the canal sides, creating some really interesting patterns.
I leave lots of white paper to start with. I reserved some whites with wax crayon and I'll paint some in with gouache, but luminous white paper is the perfect foil for the green waves.

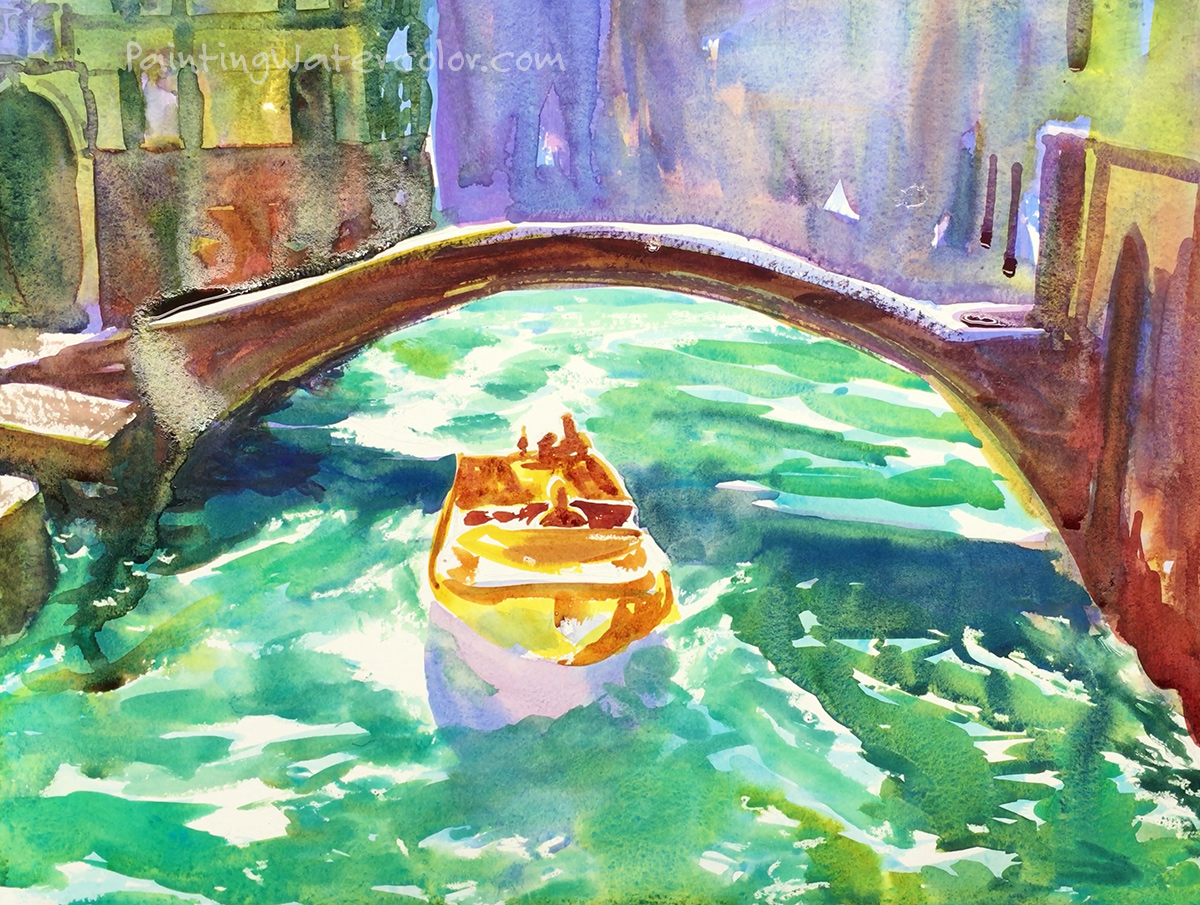
Painting Demonstration 3
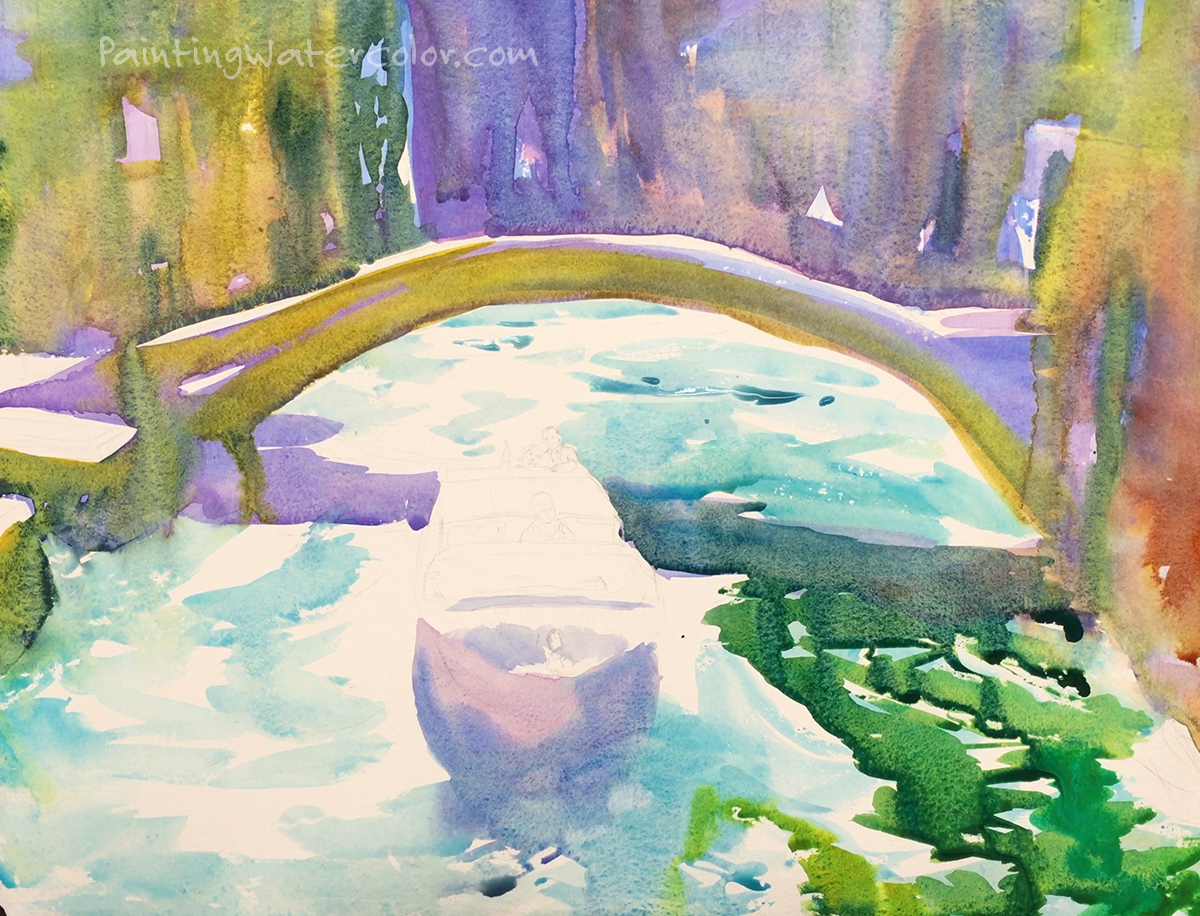
While the cobalt teal is still wet, start bleeding in a mix of cobalt teal and nickel azo yellow. Let the pigments flow and separate, creating wave patterns.
I start the boat shadow with cobalt violet and ultramarine blue. I want the hull and the boat shadow to flow together.
Artist Tips
Continue to leave white paper. Transparent reflections will make your painting glow!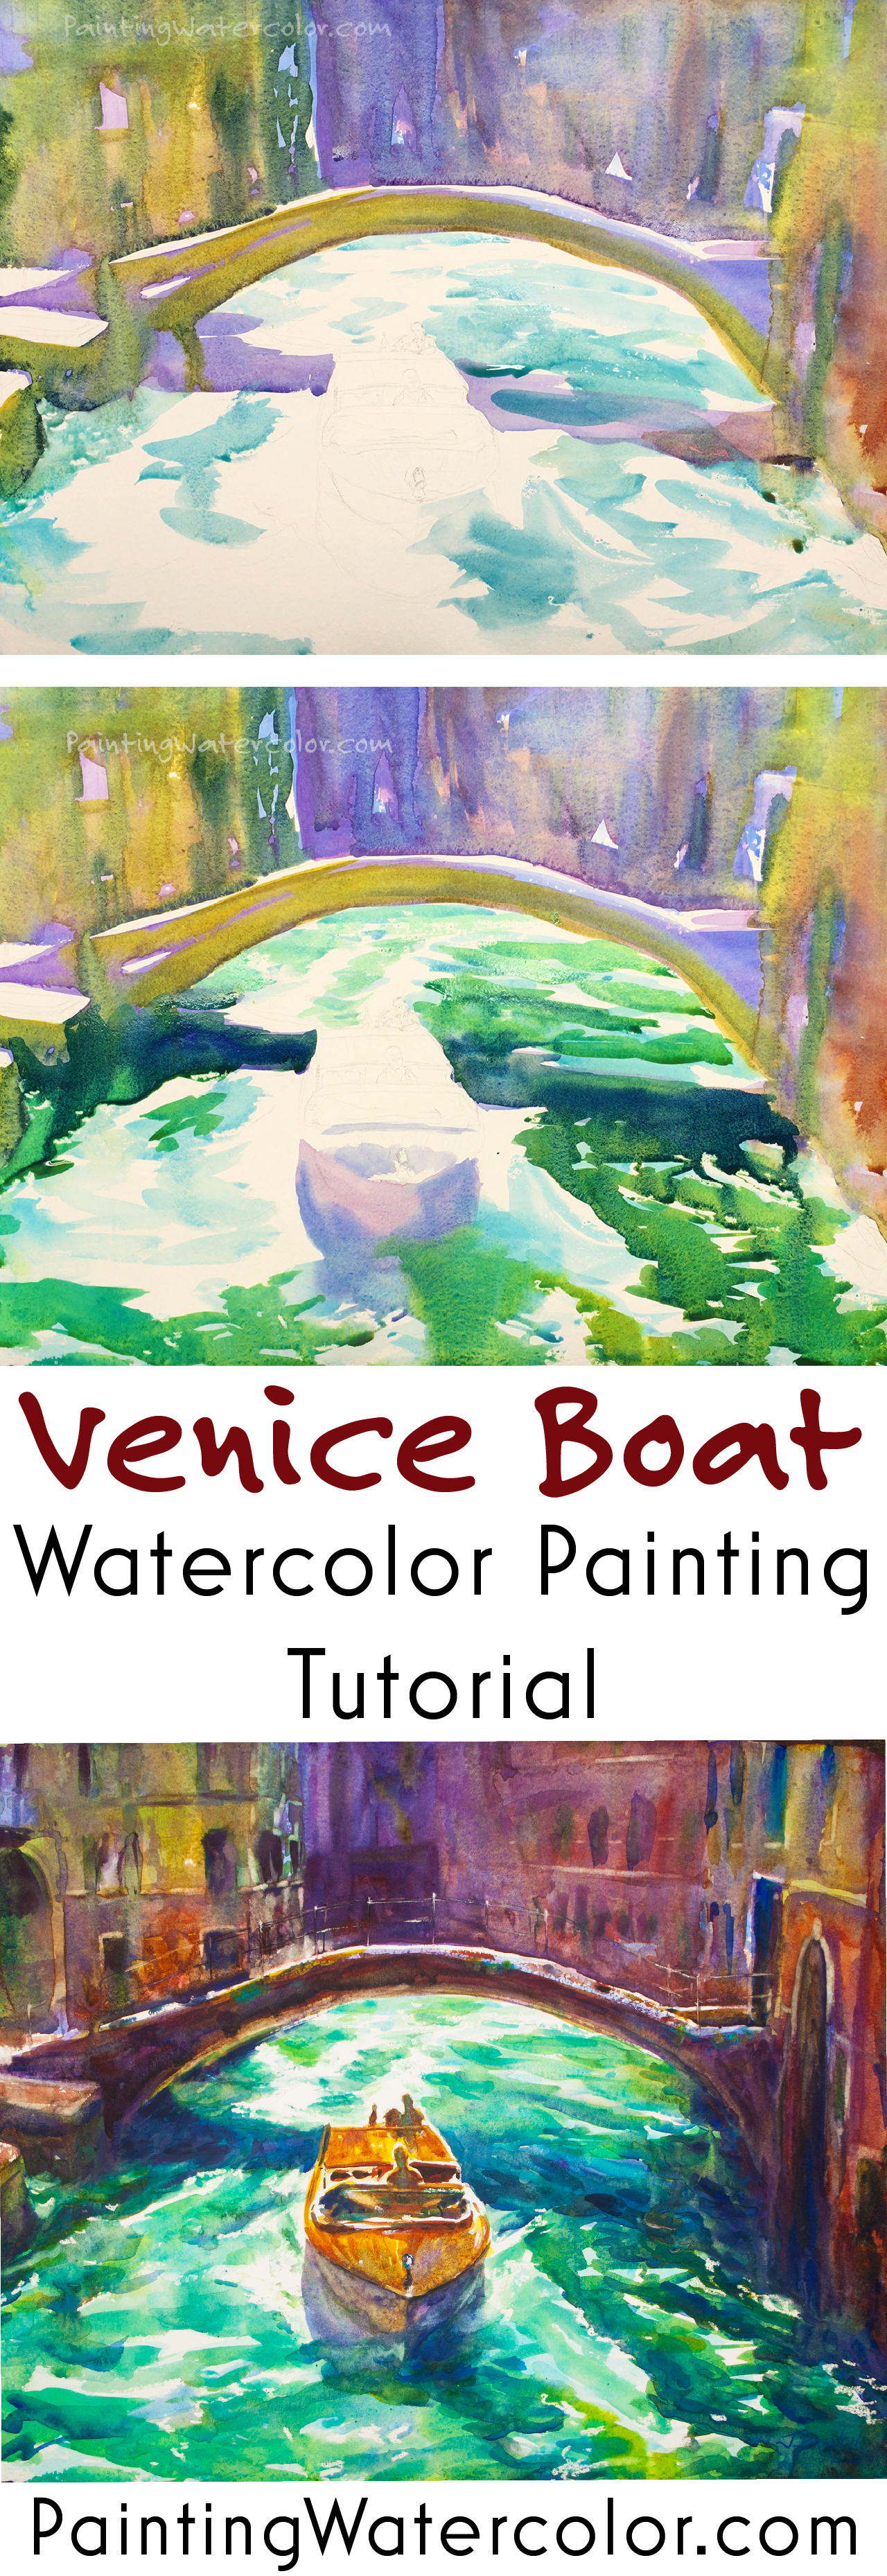
Painting Demonstration 4
I paint some strong darks in the bridge shadow with ultramarine blue. I let the pigment flow through the shadows of the other waves. I'm using the shadow to define the back of the boat.
Painting Demonstration 5
I start adding a few more strong darks to the background. It's still a little too pastel to contrast nicely with the water and boat. The bridge needs to be very dark to frame the boat so the background needs to be dark as well.
When I'm painting water, I really let my brush move. The fast action of the brush, the multiple blurring and sharpening of the layers make the water dance.
Painting Demonstration 6
If you want to contrast with bright green water, dull red is a pretty safe bet! The dull warm darks are starting to really set off the green water and are echoed by the bright warm of the boat.
I'm really enjoying painting the boat hull. Deep purplish shadows blurring in the waves contrasting with the golden boat deck. Gorgeous colors here!
Painting Demonstration 7
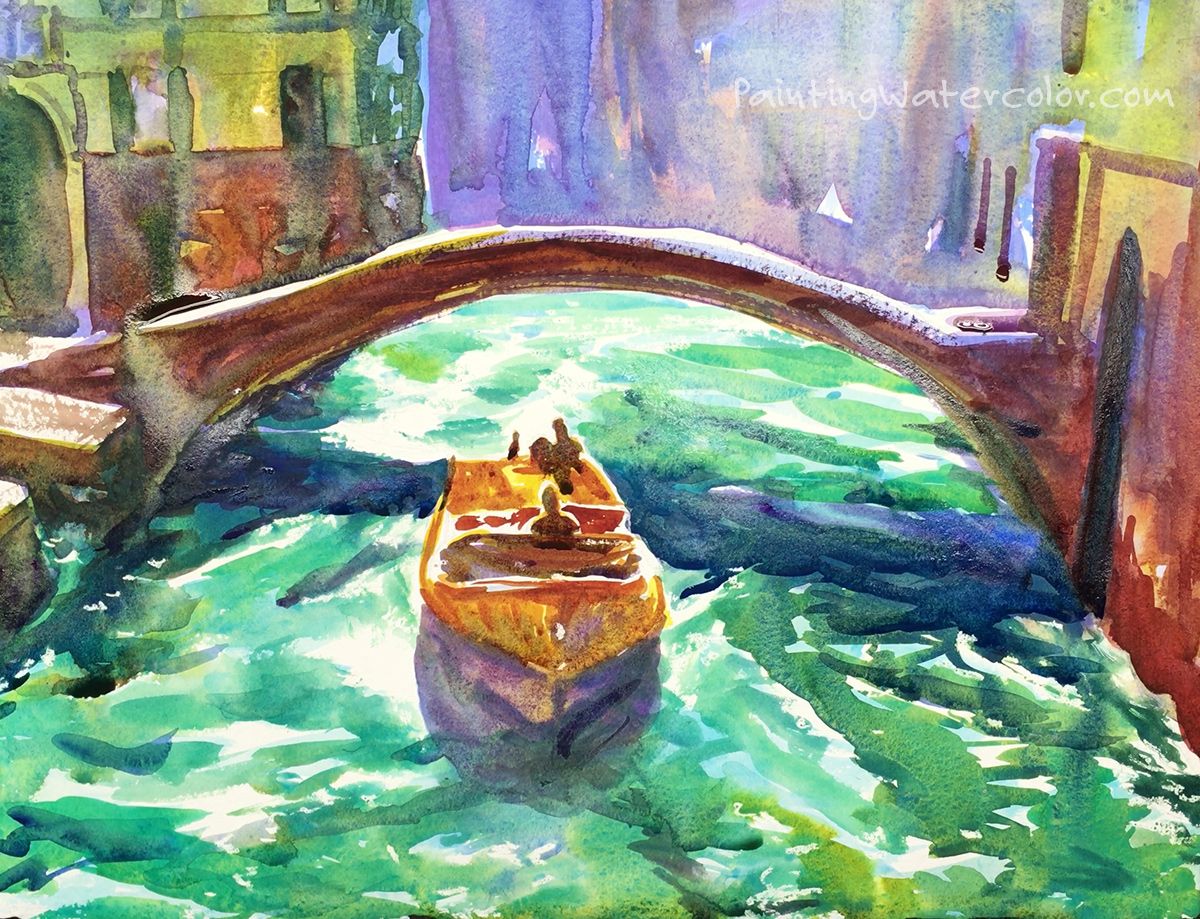
It's difficult to hold myself to silouettes for the figures and most of the boat. It's so easy to add just a line or two - and end up ruining the simplicity of the boat.
I've added another layer of darker contrast in the waves. Just a few dashed lines, going with the flow
Darkening the bridge emphasizes the darker color echo and frames the boat nicely.
To purchase How to Paint a Venice Boat original watercolor painting, please click!
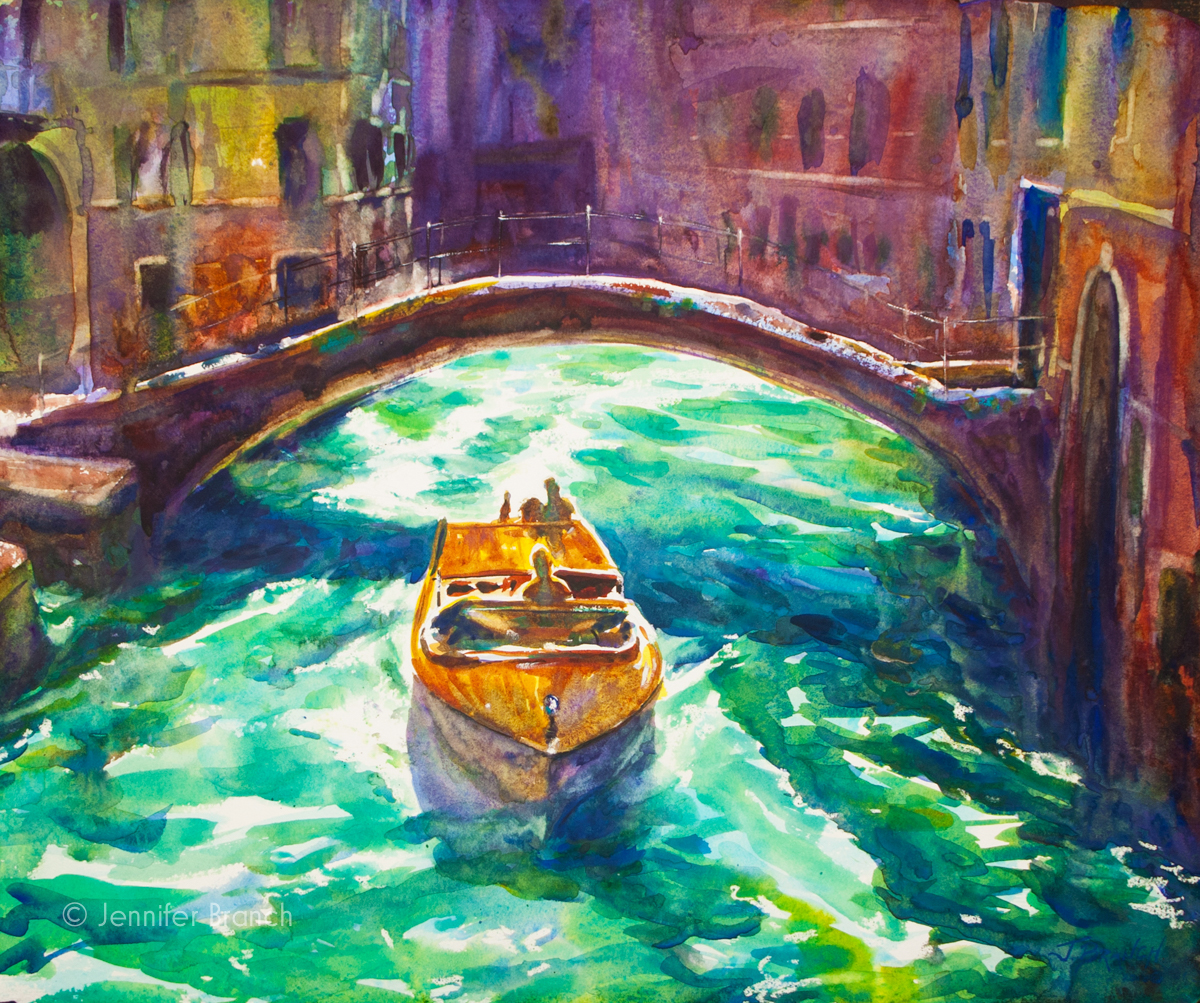
How to Paint a Venice Boat Final Watercolor Painting!
I love this painting! There's something magical when what starts out in my head makes it on to the paper.
I'm glad I changed the boat passengers from the sole photographer to the romantic couple. After all, a tourist is rather dull. We'd all rather be on a romantic adventure - taking lots of photos!
I ended up darkening the background quite a bit. After it dried, I pulled out a few highlights and added some more with gouache. I love the sunlit effervescence of Venice, but it just wasn't framing the boat and water. Pastels weren't working for this painting, no matter how lovely. Always keep in mind what the point of the painting is and be willing to change everthing to make it work. The dull reds now perfectly echo the gleaming golden red of the boat.
I also broke up the line of the bridge a bit with white gouache and pulling out some pigment. The harshness of the line distracted from the water and boat.
I'm happy with how this painting turned out! I love the water. Those deep translucent greens are made for watercolor. An adventure on a sunny day in Venice!
I hope this painting inspires you to go paint a boat and water this weekend!